


Figure it out - Page 169-170
Last updated at March 16, 2026 by Teachoo
Transcript
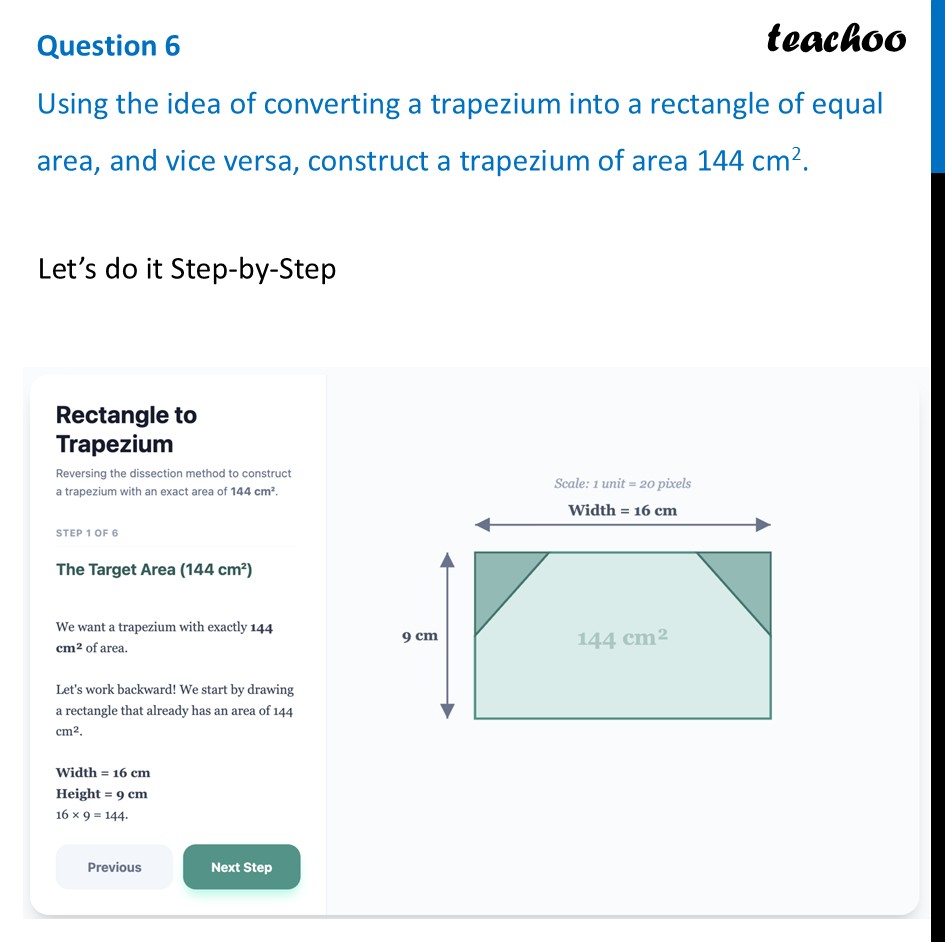
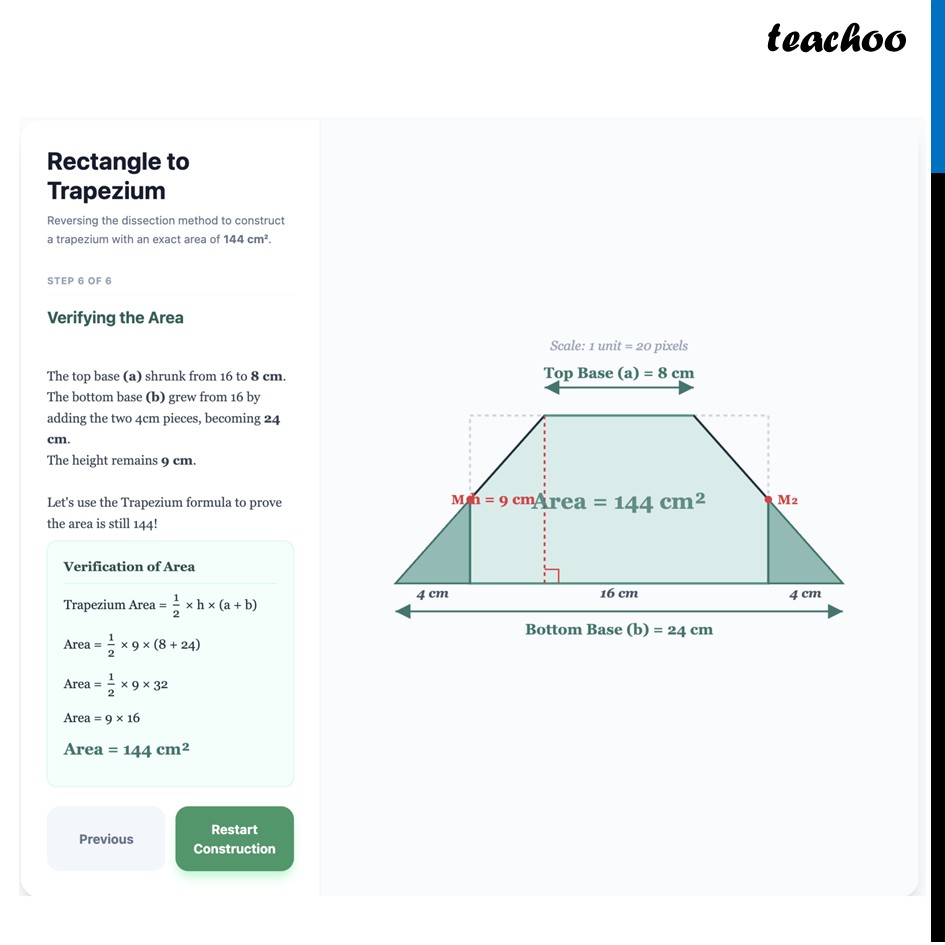
Question 6 Using the idea of converting a trapezium into a rectangle of equal area, and vice versa, construct a trapezium of area 144 cm2.Let’s do it Step-by-Step Rectangle to Trapezium Reversing the dissection method to construct a trapezium with an exact area of . STEP 1 OF 6 The Target Area ( ) We want a trapezium with exactly 144 of area. Let's work backward! We start by drawing a rectangle that already has an area of 144 . Width Height . Previous Next Step Rectangle to Trapezium Reversing the dissection method to construct a trapezium with an exact area of . STEP 2 OF 6 Plan the Dissection Mark the exact midpoints on the left and right edges ( and ). Because the total height is 9 cm , these midpoints sit at cm. Now, let's carve out two right-angled triangles from the top corners. We will give them a top base of each. Previous Next Step Rectangle to Trapezium Reversing the dissection method to construct a trapezium with an exact area of . STEP 3 OF 6 Isolating the Pieces By marking these lines, we've split our 16 cm top edge into three segments: cm , and 4 cm . The center shape is now a hexagon, and we have two detached corner triangles. The total area is still exactly . Previous Next Step Rectangle to Trapezium Reversing the dissection method to construct a trapezium with an exact area of . STEP 4 OF 6 The Rotation To convert this into a trapezium without losing any area, we rotate the two corner triangles exactly around the midpoints M1 and M2. Watch as they swing down to the bottom corners! Previous Next Step Rectangle to Trapezium Reversing the dissection method to construct a trapezium with an exact area of . STEP 6 OF 6 The Final Trapezium The pieces fit perfectly! Because the triangles were rotated, their hypotenuses align perfectly with the core shape to form perfectly straight, slanted sides. Let's look at our new dimensions. Previous Next Step Rectangle to Trapezium Reversing the dissection method to construct a trapezium with an exact area of . STEP 6 OF 6 Verifying the Area The top base (a) shrunk from 16 to . The bottom base (b) grew from 16 by adding the two 4 cm pieces, becoming 24 cm. The height remains 9 cm . Let's use the Trapezium formula to prove the area is still 144! Verification of Area